Add or Edit Time Block Schedule #
Schedule >> Schedule Settings
Overview. #
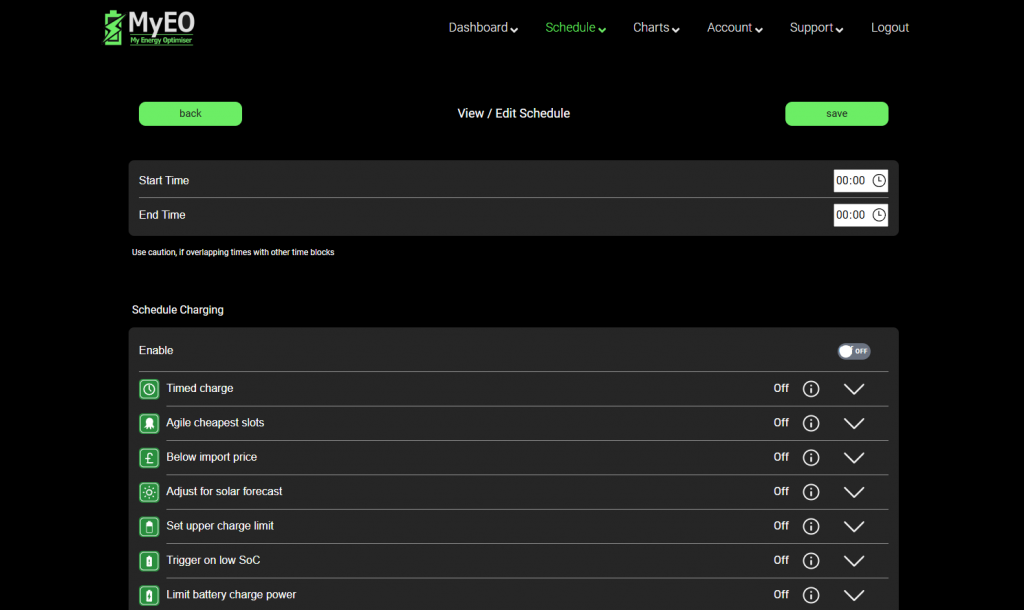
After you click “Add Time Block” on the schedule settings screen, the “View / Edit Schedule” window will open. You will see three sections. 1) Times 2) Schedule Charging Settings and 3) Schedule Discharge Settings.
Instructions. #
1.
Times #
Adjust the start and end time as you require for this schedule. You can leave the settings as a single 24 hour block. Your inverter is read around 5 minutes before the start time, so keep this in mind when setting the times.
2.
Schedule Charging #
Enable charging using the toggle switch at the top of the schedule charging section. Use the drop down arrows to the right to see and select the specific settings required. Click on the “i” information icon to read more about the specific setting.
3.
Schedule Discharging #
Enable discharging using the toggle switch at the top of the schedule discharging section. Use the drop down arrows to the right to see and select the specific settings required. Click on the “i” information icon to read more about the specific setting.
4.
Save Schedule #
Use the “Save” button at the top and bottom of the schedule to save and return to the previous page.
5.
Return without saving #
Use the “back” button at the top of the schedule.
6.
Delete Schedule #
Use the “delete” button at the bottom of the schedule. a confirmation prompt will pop-up before the schedule is deleted. Instead of deleting the schedule , you can choose to disable a time block schedule on the schedule settings page.


